Swift package manager is a dependency manager developed by Apple to simplify the development process. Integrated into Xcode 11, it became a turning point in the world of dependency managers for Swift based projects. With no need to install additional software tools it serves as a user friendly, fast working iOS package manager.
Below, we look at how the Fastlane tool can be used for task automation and CI service.
How to add a new package with SPM?
New packages can be added to your project via user interface of Xcode in the following steps:
1. Go to menu bar and select File -> Swift Packages -> Add Package Dependency
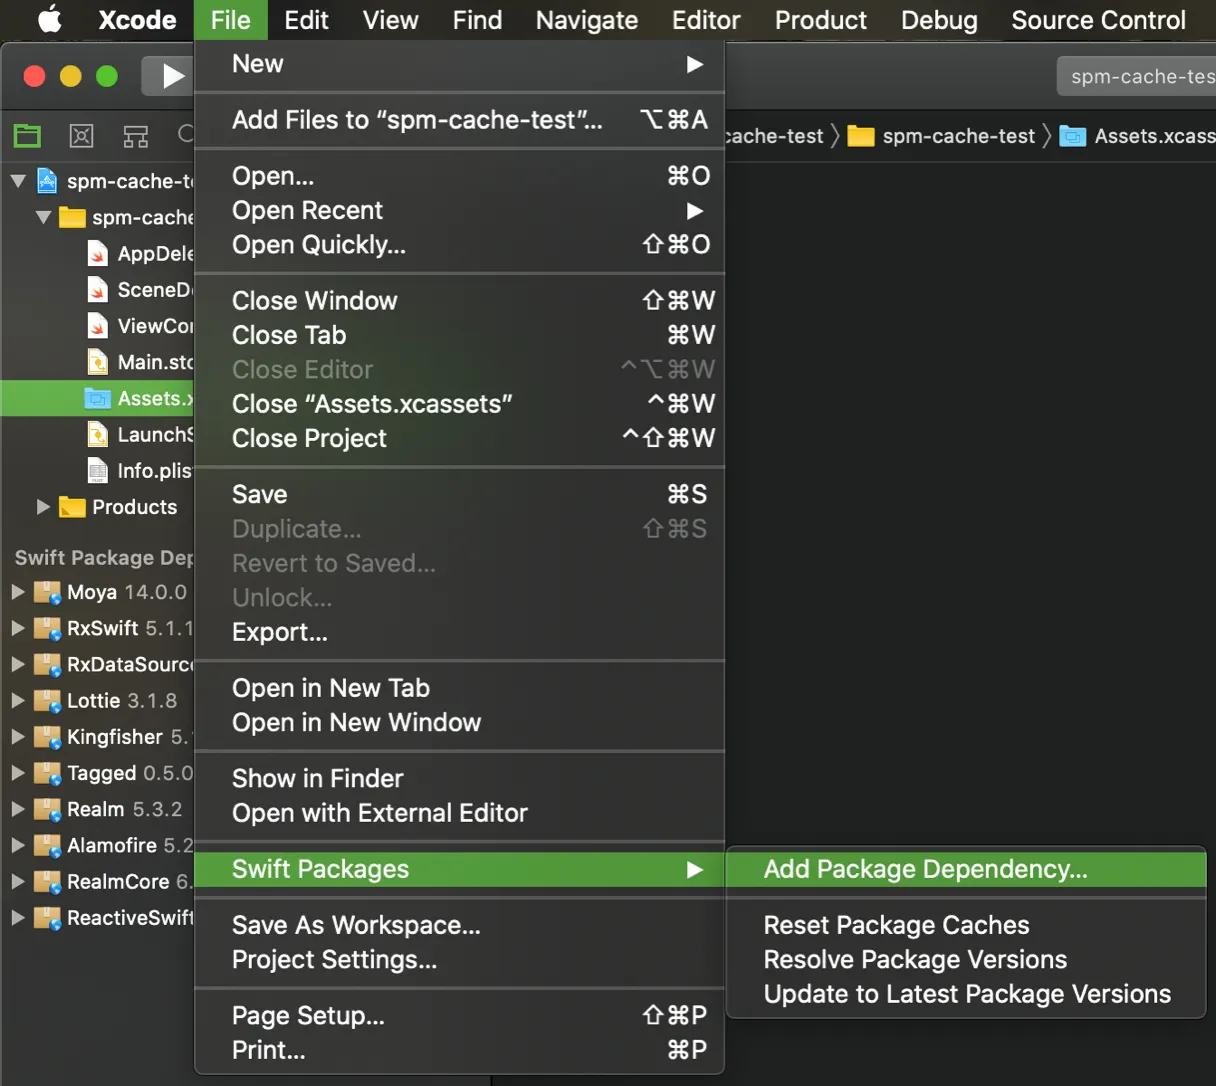
Or select the tab with Swift Packages in the project section.

2. Enter repository link, select a version and choose target.

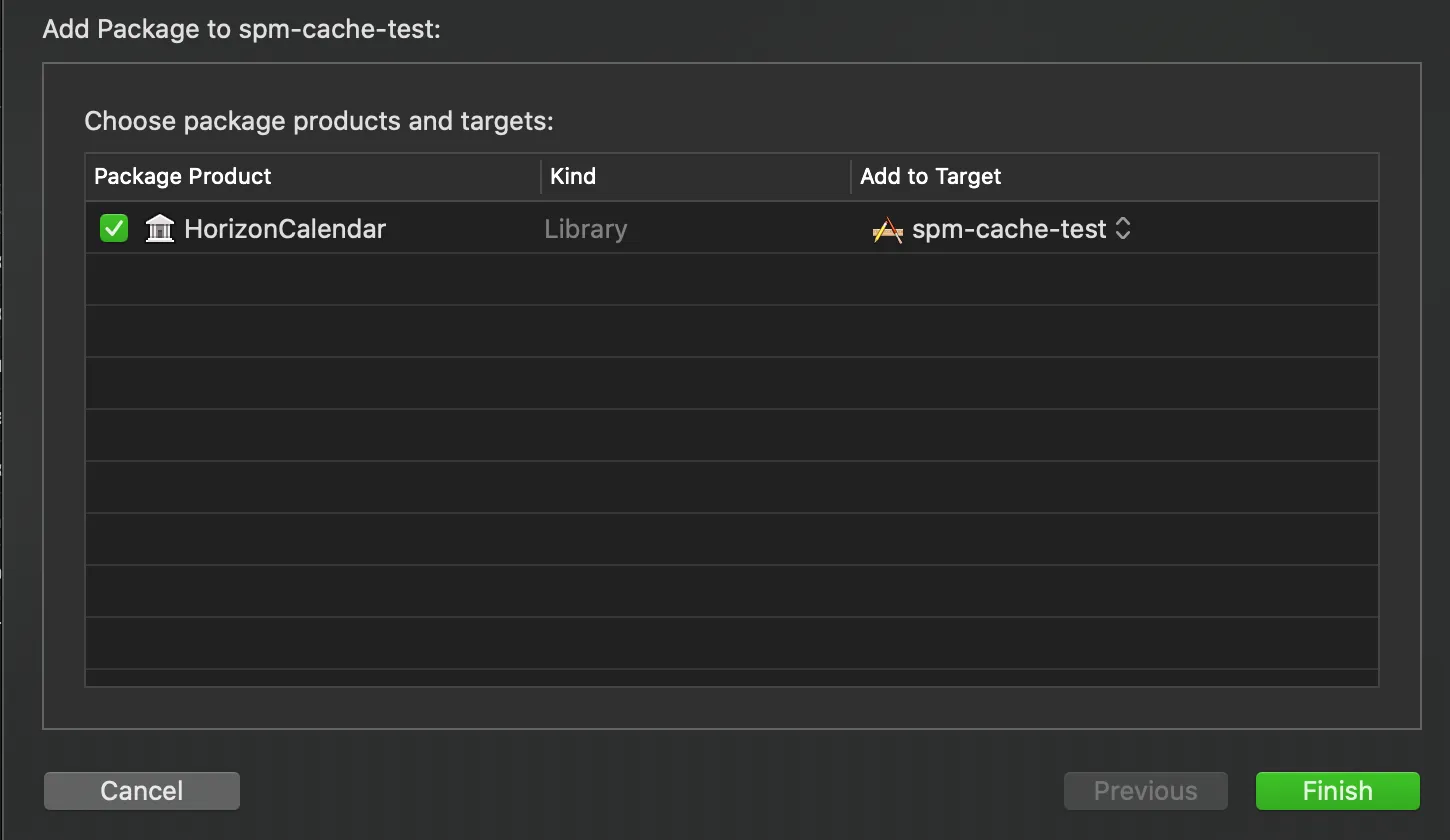
3. Wait until Xcode downloads a package automatically.
4. Profit! You have added a new package.

For more information about package installation go to the Apple Developer website.
How SPM works on CI
To build a project with SPM, you do not need to start by calling the command to resolve dependencies as in CocoaPods because it is included in the build.
As an example, here is a command to build an application via the terminal:
This command simultaneously checks dependencies, downloads missing packages, and then starts the usual build of the application.
But what is a problem?
Of course, installation dependencies will take a significant amount of time. However, because you need to do this only once during development, it isn’t a significant problem.
So on local machines fetched and built dependencies are stored in the derived data directory, while CI clears build-cache after every run.That said, since on CI it needs to be done whenever the job runs, it slows down the process.
Caching of dependencies
The best way to speed up job on CI is to cache dependencies.
In order to cache the dependencies, they should be located in the project directory, but by default, SPM downloads the dependencies into the system folder: ~/Library/Developer/Xcode/DerivedData. And you should specify the download folder explicitly.
SPM packages can be cached in the following steps:
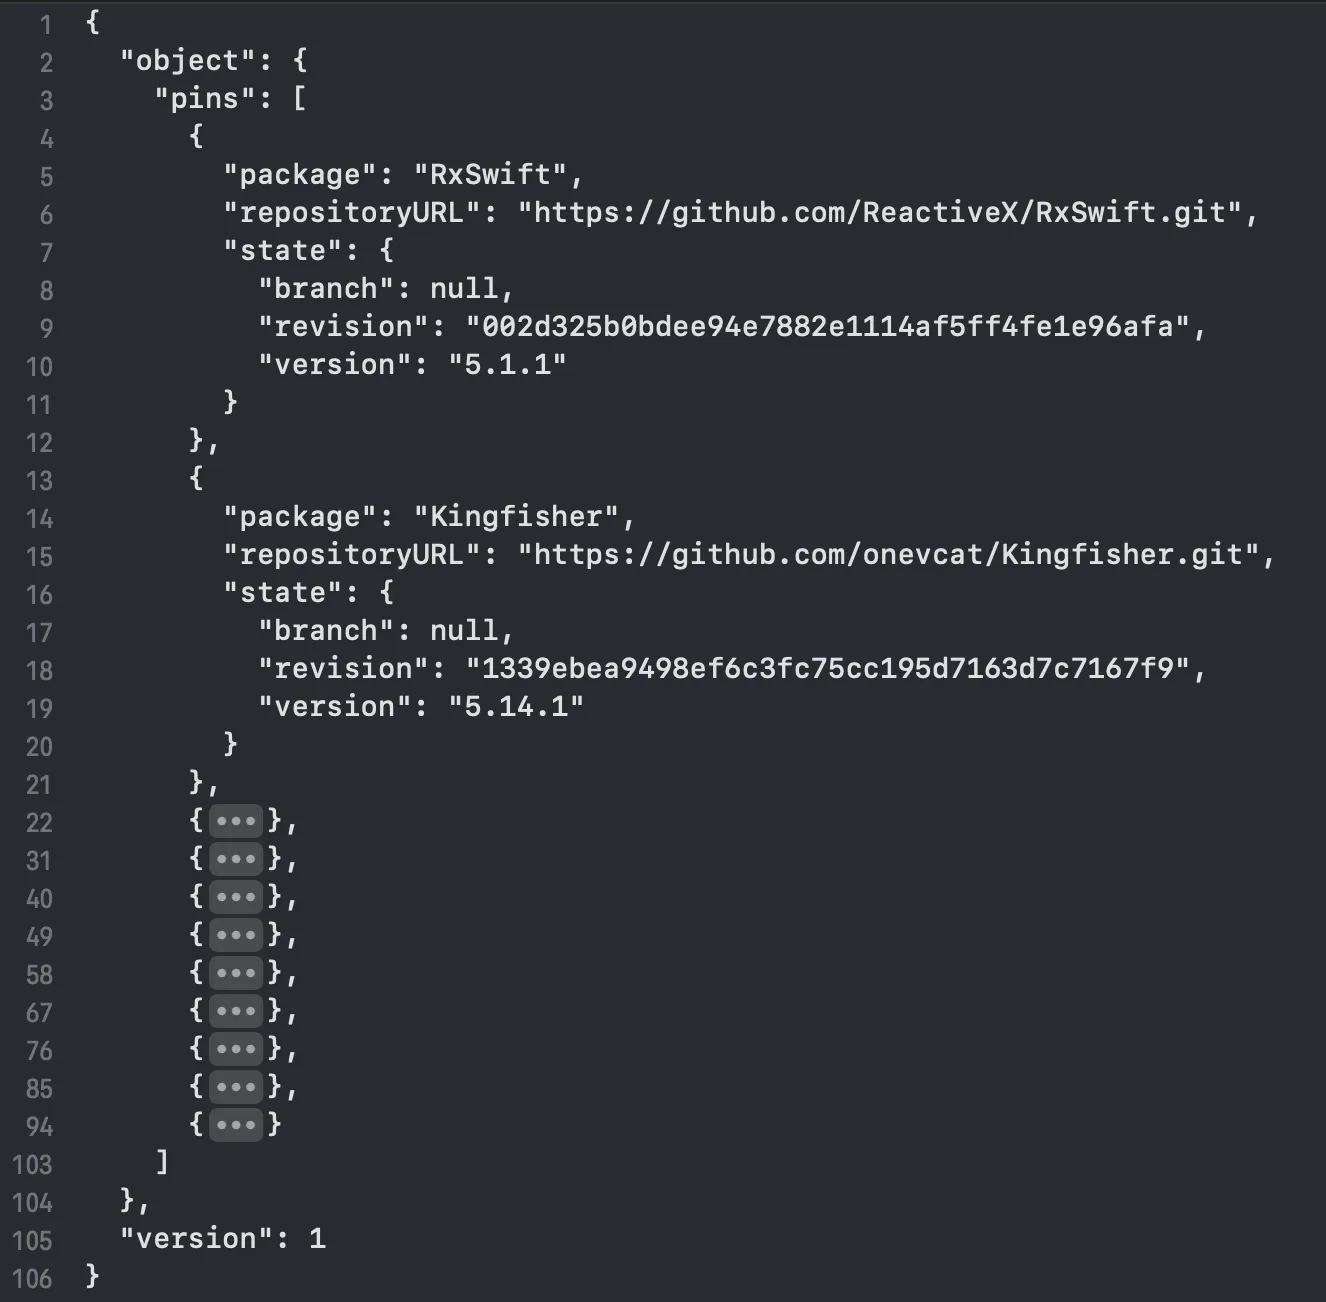
1. You should ensure Package.resolved is under source control.
Package.resolved describes the state of dependencies in the project.
It looks like that:
The path where Package.resolved is located:
spm-cache-test.xcodeproj/ project.xcworkspace/xcshareddata/ swiftpm/ Package.resolved
2. To change the path of SPM dependencies, you need to override clonedSourcePackagesDirPath.
clonedSourcePackagesDirPath - is an `xcodebuild build` command option that specifies the directory to which remote source packages are fetched or expected to be found
To build project, you need to run the command in the terminal:
If you are using Fastlane, you can pass clonedSourcePackagesDirPath flag in `run_tests` and `build_app` actions:
Note: building scheme must have a test target
Example of command to build and archive project to create IPA from Fastlane:
Note: The most important thing here is to specify cloned_source_packages_path as the path for caching.
Fastfile example file with build lanes:

3. After setup Fastlane you need to set up a CI config file.
There are two possible flow to cache SPM packages:
1. Restore
2. Build
3. Save
Or the second one:
1. Restore
2. Resolve xcodebuild -resolvePackageDependencies
-clonedSourcePackagesDirPath SourcePackages
3. Save
4. Build
In the first method, resolve Dependencies is included in the Build phase. While this method is a little faster, the order is stricter and, consequently, save should be used after build, but this ordering is not perfect, because, in case of failed build or failed tests, our dependencies wouldn't get cached
In the second method, checking the status of dependencies occurs in resolve and build phases.
Also, add SourcePackages to. gitignore, and if the project has swiftlint then add SourcePackages directory in .swiftlint.yml exclusion.
CircleCI
Example .circleci/config.yml file for build with cache:
Note:
4. After adding the config file, select the projects tab on CIrcleCI and click on "Set up Project"

5. After that click on "Use existing config".

Results
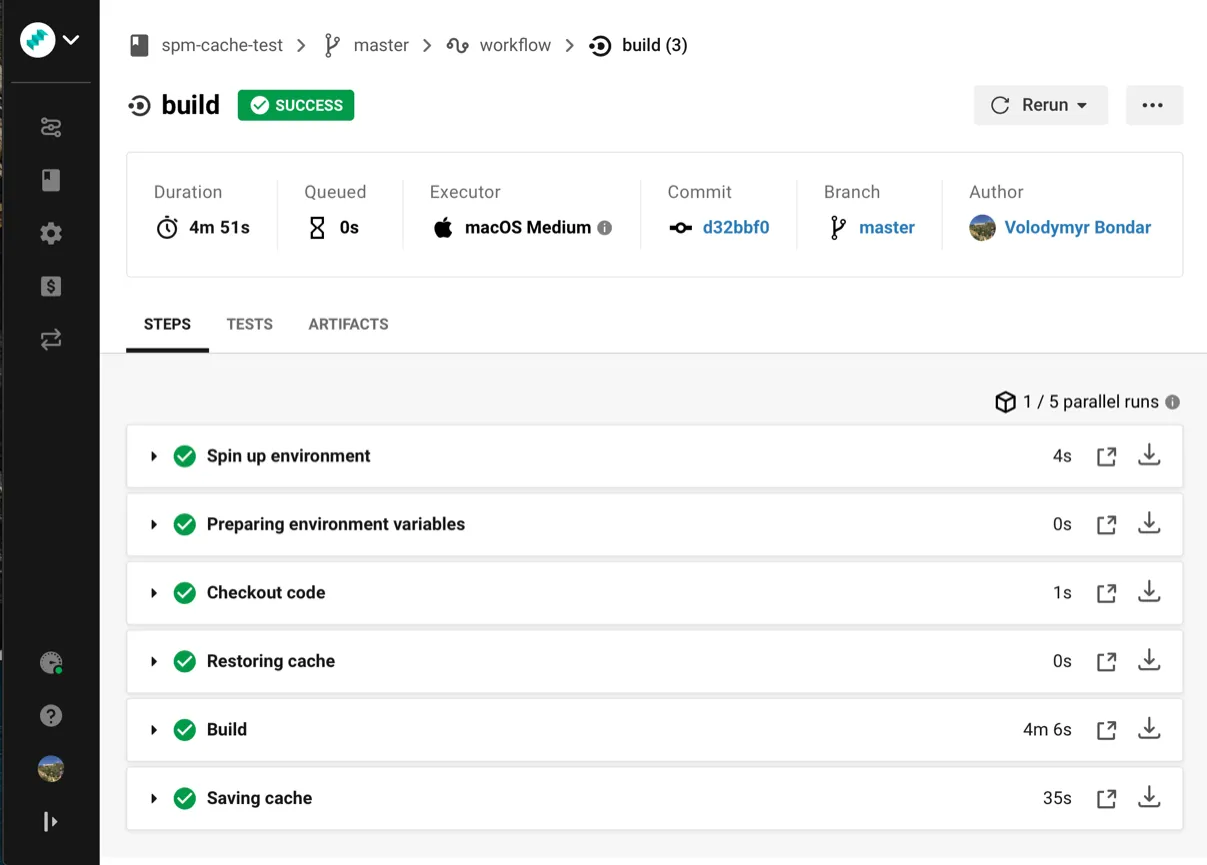
First build with fetching takes ~4m and ~30sec for storing dependencies
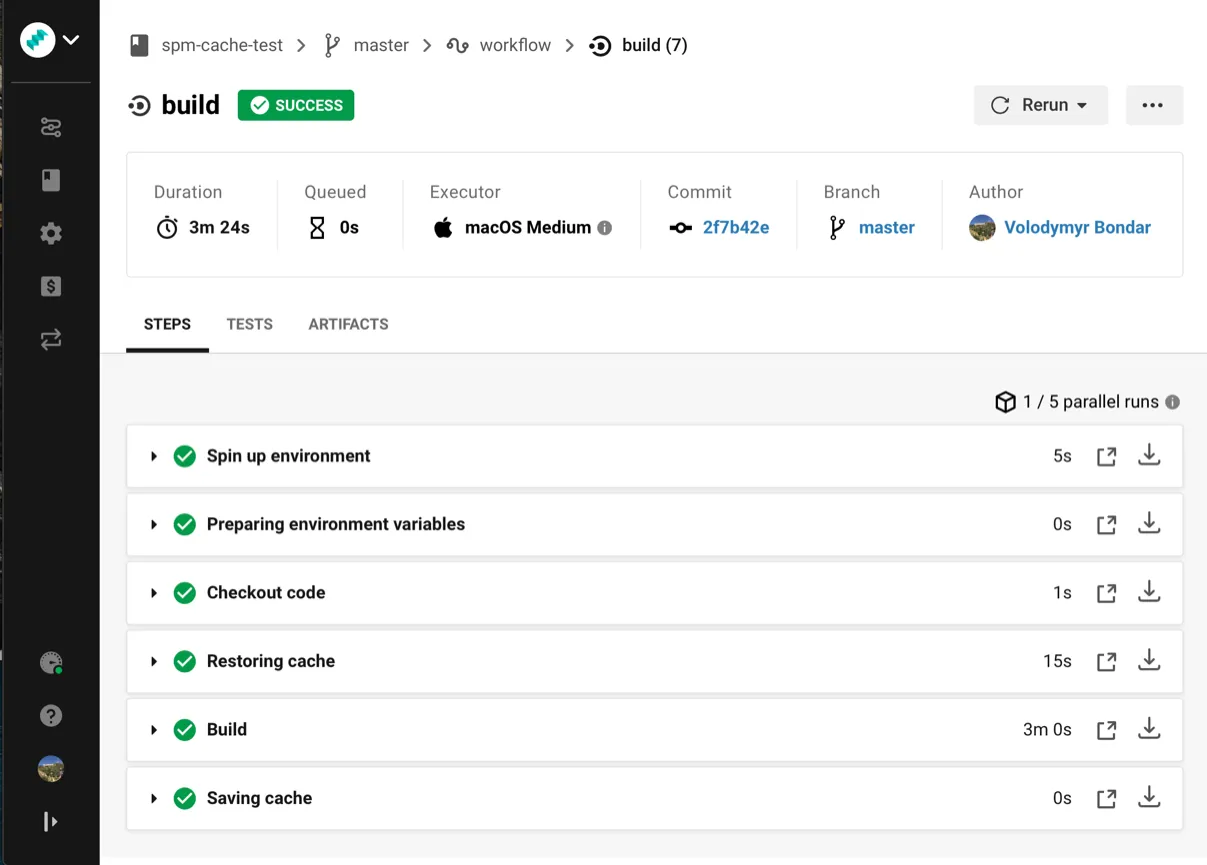
As we can see, build + restoring takes ~20% less time.
Conclusion
Since Xcode 11 release, almost all maintainable libraries have added SPM support. Consequently, it's become possible to use only one dependency manager for now. Caching SPM dependencies will save time on fetching and speed up the CI process.


.avif)