Hello, readers!
I’m a QA specialist in Uptech, a Design & Development company which creates mobile and web apps. Today I want to enrich your knowledge about automated mobile testing. In this article, you will find step by step guide along with a simple example of automation testing 💁💻.
What do we need for automation?
I am going to tell you about creating tests using Cucumber, Appium, and Java in IntelliJ Idea. Next, we will learn how to write a sample feature and automate testing. Let’s get started!
Appium — a framework that allows you to write simple automated tests for your mobile apps and websites.
Cucumber — a framework which supports behaviour driven development.
Gradle — a build tool.
JUnit — a framework for running tests.
How to set up an automated testing?
Appium is a powerful tool for testing, but it is not straightforward and easy to install. The documentation does not provide a good tutorial to get things working fast. In this post, I am going to provide everything you need to set up Appium for running a basic test scenario written in Java.
First of all, we need to setup all the components:
Step 1: Install Java
Step 2: Install Android Studio
Step 3: Add JAVA_HOME and ANDROID_HOME to the environment variable
Step 4: Configure Emulator in Android Studio
Step 5: Install Node.js
Step 6: Install Appium Server and Appium Client
Step 8: Install IntelliJ Idea
Check the installation of the components using the command in the terminal:
If everything is ok, you will see the following screen:

Setting up Appium configuration
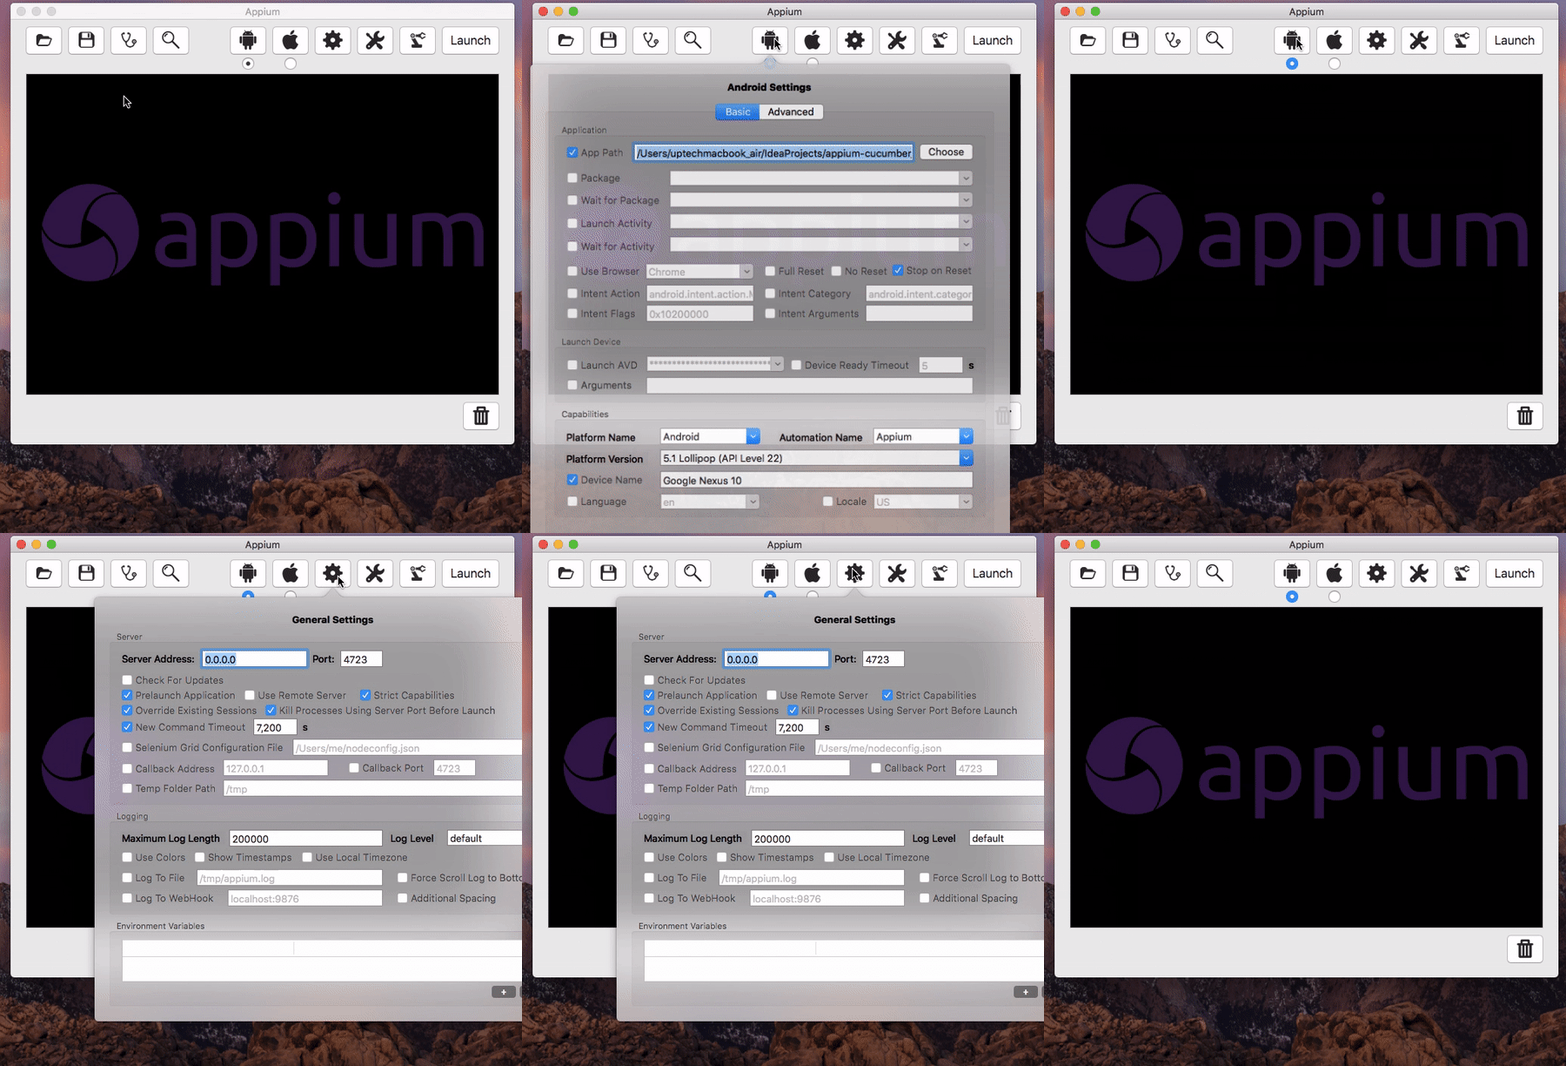
Launch the Appium GUI application ☝️️. Click Android icon and enter these details:
- App Path — browse to the .apk location under the app folder
- Platform Name — select Android
- Automation Name — select Appium
- Platform Version — select 5.1 Lollipop (API Level 22) from the drop-down
Once the preceding settings are done, click on the General Settings icon and choose the following settings:
- Select Pre-launch Application
- Select Strict Capabilities
- Select Override Existing Sessions
- Select Kill Processes Using Server Port Before Launch
- Select New Command Timeout and enter the value 7200.

Also, you need to install your application on the emulator. You can use the emulator from Android Studio. When it is done — launch the Appium server.

When you start the Appium app, you will see icons at the top. I highlighted the Appium Inspector in red.

When you click on the highlighted icon (Appium Inspector), it will open a new window with the application UI state capture.

Click on any element on the right panel to find the details about it. After clicking Details you will see a group of attributes listed for the selected element:

You might notice the attribute “resource-id” and the value of id attribute. It can be used as an identifier for the element in your tests.
Example of using automation on mobile devices
To use automation on mobile devices, we will create a simple test for login with correct credentials. The test is written using Page Object Pattern.
Step 1: Create a Gradle-project and add required dependencies for JUnit, Appium, Cucumber, and log4J to your “build.gradle” file. The current “build.gradle” and the source code of the project are available here.
Step 2: Add Cucumber plugin and create “.feature” file.
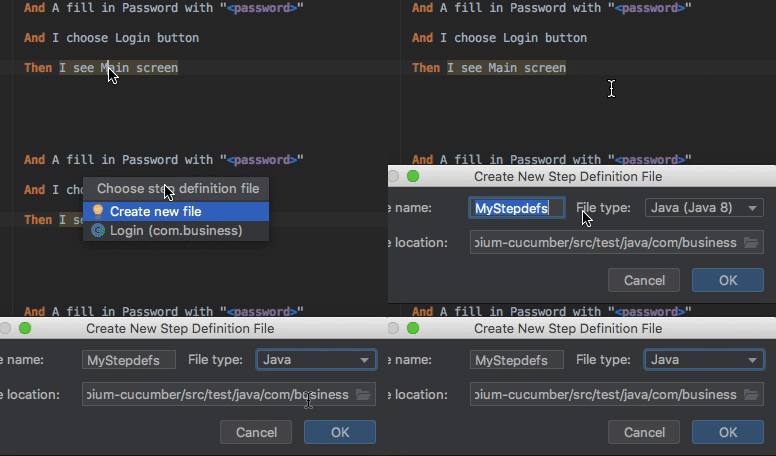
Step 3: Create steps definition. Press Alt+Enter to show the Create Step Definition intention action. Select the target step definition file from the pop-up list.

Step 4: Every testing scenario should be executed on some specific testing environment. The desired capabilities for the mobile emulator for Android and iOS:
Step 5: Now we need to add the page with elements and methods using Page Object Pattern:
Step 6: Cucumber has a very interesting feature called hooks. They help us execute a block of code before or/and after each scenario. Add them:
Example of a successful test for Login with valid credentials:
Step 9: Since we want to use the JUnit framework to run Cucumber, we need to create the following class:
You are done 💪
With this, we can run the tests in the same way as we run typical JUnit tests. There is a myriad of different ways you can set up, build and run your Appium tests as well.
Conclusion 💡
In the article, I described how to create tests for a native app. We also learned how to set up Appium. In most cases, Appium is the best choice out of all the available options because it is a ”cross-platform” automation tool and you can write software automation tests against iOS and Android platforms using the same API. By adding a Cucumber framework you integrate a BDD approach into your project. Since BDD is a part of test-driven development (TDD) you also get a shared view and process for all collaborators as a bonus 😃.
See the full project with the source code on GitHub.
Let us know if you have any questions or would like to share your experience with Appium test!


.avif)


